It's that time of the year again! With just a couple weeks until Halloween, the crunch time for costumes is going to begin. Don't have any ideas? Don't worry! Halloween is my favorite holiday and I'm happy to share my favorite easy fandom costume ideas.

Castiel was one of the easiest Halloween costumes I've ever done. Also known as a "closet cosplay", I already owned basically every piece of his iconic angelic costume. I was lucky enough to borrow a trench coat from a friend, but any tan coat from a thrift store would work too! Just add a white shirt, black pants, and a dark tie and you're on your way to being the Winchesters' favorite angel friend.

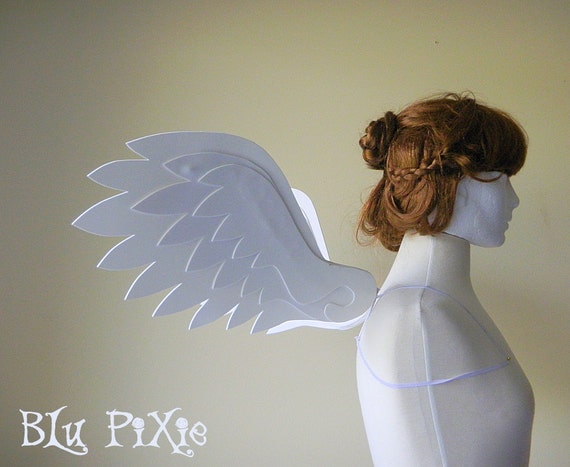
Want wings with that outfit? For my costume I threw together 20 minutes wings, made from foam. These are lightweight and insanely easy to make. I made mine small and blue for that extra cute factor, but you can make them any color and size you want.
Materials:
- craft foam
- spray adhesive (or any tacky glue)
- pen / pencil
- paper
- scissors
- scotch tape (optional)
- safety pins

Instructions:
- Print out wing outline image, or free hand draw any wing shape onto paper.
- Cut out the paper wing. This will be your pattern.
- Place paper pattern on the craft foam. You can use tape to help steady your pattern.
- Lightly draw the outline wing shape onto the foam.
- Cut out wing shape from foam. Repeat this process twice so you have a pair of wings.
- If you want layers of wings in different colors, you can print out the wing outline (or freehand draw) in different sizes. For printing, you can just set your document to 80% or 60% or whatever smaller size you need.
- Cut out smaller paper wing shape, trace on foam, cut out the foam. Repeat for as many layers as you would like.
- Take your foam outside (recommended) and lay down newspaper (highly recommended). Spray the adhesive evenly across the back of your smaller wing.
- Carefully place the smaller wing onto the larger wing. This is how you build up your layers.
- Repeat with other side of wing.
- Once the wings are assembled and not tacky anymore (takes an hour or so), you can attach them to the back of your trench coat using safety pins wherever you want them to hang.

It's okay if you mess up! Lining up the wing shapes can be difficult and spray adhesive doesn't leave you much time to reposition the wings. Practice a few times on how to line up the shapes before you apply glue, so you know how you want it to look. Craft foam is also thankfully cheap ($1 a sheet maximum at most places) so if you need to buy a few extra sheets in case of mistakes, it won't cost you an arm and a leg (not like Worbla. omg Worbla).
My first pair of wings, as pictured, were actually free hand drawn. If I were to make another pair (and I'm certainly considering it for Halloween again!) I would definitely use a pre-made pattern, like the one I'm about to give you for free!
Go ahead and download this baby right here.
 <-- thumbnail of the wing outline
Happy crafting, and don't forget to tag @BombDotComGeekery in your online posts so I can see your magical creations!
And here's some foam wing inspiration, for those ambitious nerds out there.